


This Guide is for users Setting up Microsoft Outlook 2013 & 2016 for the first time or users editing email settings.
Summary: Setup Microsoft Outlook 2013 & 2016 to receive and send email.
1. Click the File tab and in email settings click Add Account.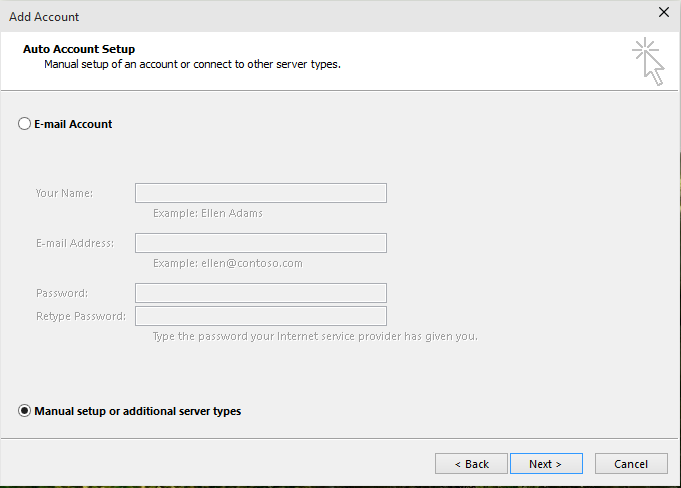
2. Select Manual Setup settings or additional server types and click Next.
3. Select POP or IMAP email account.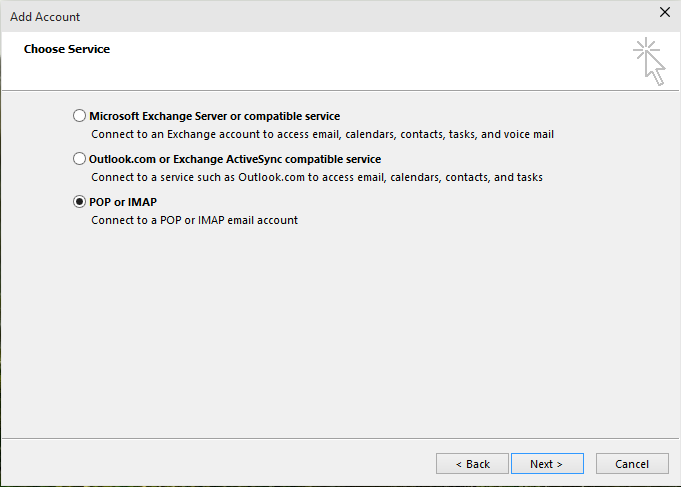
4. Fill in the relevant fields :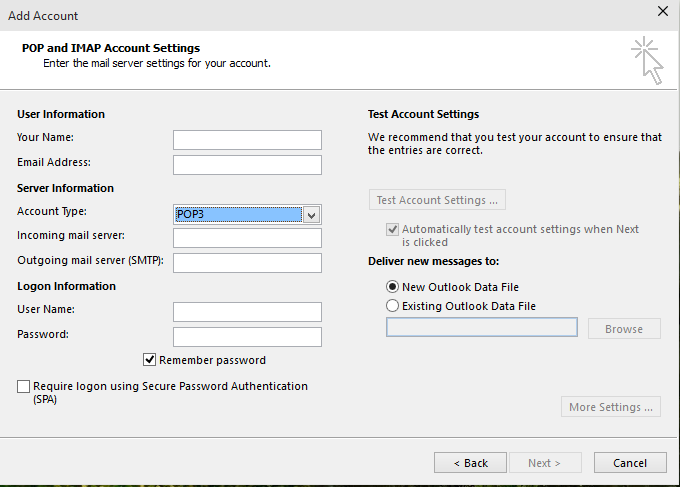
User Information :
- Your Name - This is the name recipients will see when ye send them an email.
- Email Address - This is the email address you are setting up.
Server Information :
- Account Type - For Elive this is always POP or IMAP.
- Incoming Mail Server - In most cases this will be the server setting provided to you when you signed up for hosting
- Outgoing Mail Server - Same as incoming mail server
Logon Information :
- User Name - This is your email address
- Password - Email Password.
Click more settings and click Outgoing Server Tab .
Click my outgoing server requires Authentication and then click use same settings as incoming.
Click Advanced Tab and change outgoing security to Auto and then use port 587 as the outgoing port.
*** If you are using an IMAP Connection we would recommend you put the word INBOX (must be all caps) as the root folder path.
Click close.
5. When done Users can test their account settings by clicking TEST ACCOUNT SETTINGS button.
6. Click next followed by finish.
