


If you use our Spam Scanning service with Microsoft 365, complete the required Trusted ARC Sealer setup below. We also recommend the additional Inbound Connector and Enhanced Filtering configuration. These settings help preserve the email authentication chain of trust and reduce forwarding-related DMARC failures that can cause legitimate messages to be quarantined or bounced, particularly when the sending domain has a DMARC policy of "quarantine" or "reject," respectively.
PLEASE NOTE: The screenshots below have a black/gray background, because Dark Mode is enabled. The background in your account could be white/silver.
Table of Contents
Required: Trusted ARC Sealer
Add elivescanned.net as a Trusted ARC Sealer
- Log in to your 365 Admin Center as a global admin and go to the Security Admin Center or Microsoft Defender Portal. The direct URL is https://security.microsoft.com/. Also make sure the left side navigation is unhidden.
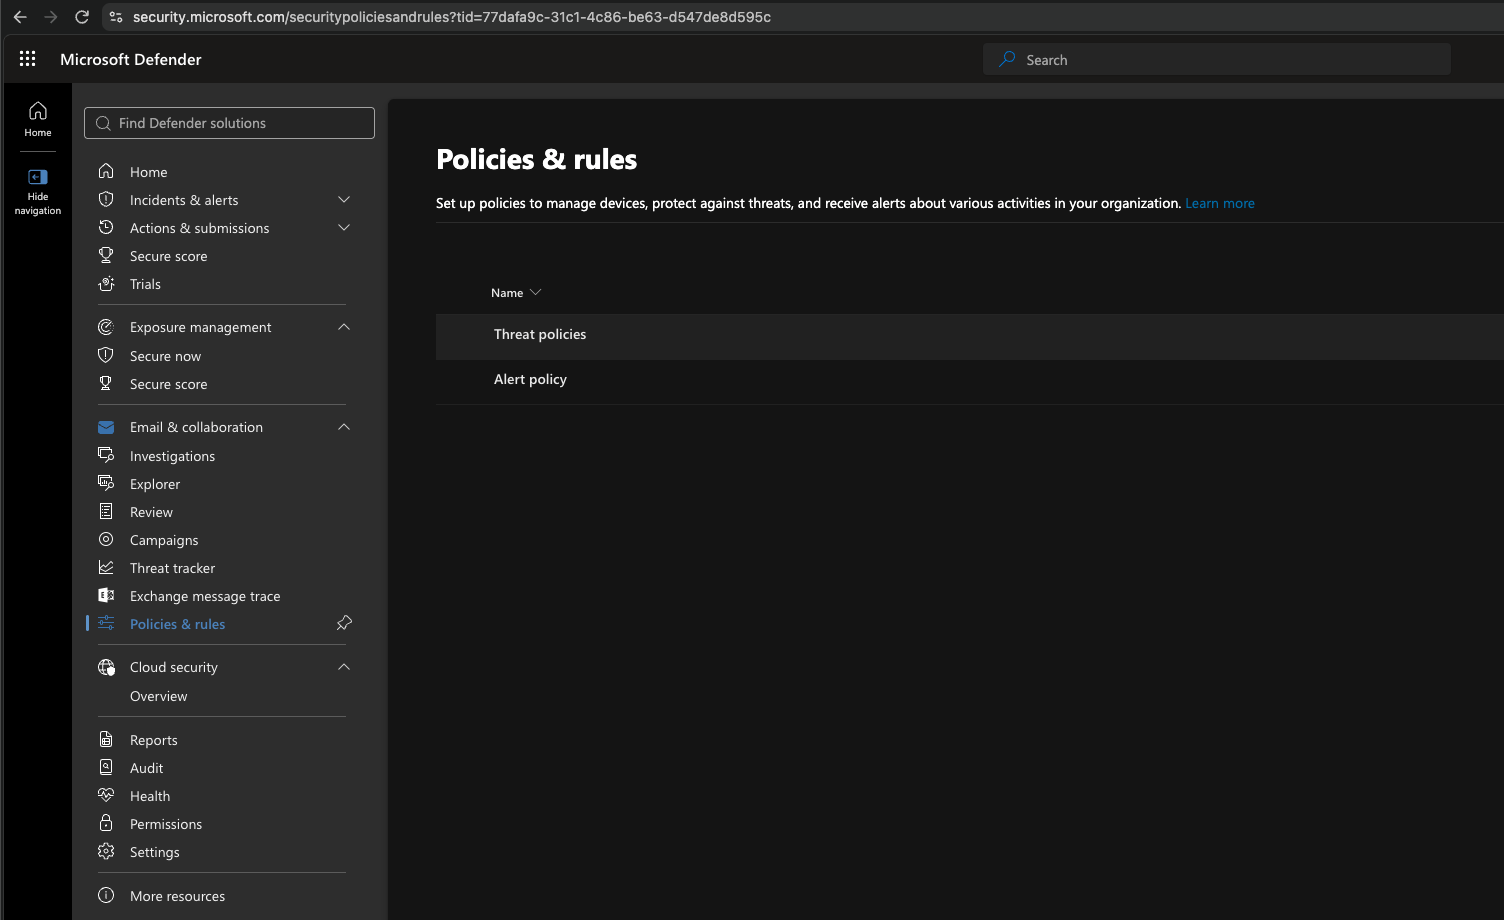
- Go to Email & collaboration > Policy & rules.
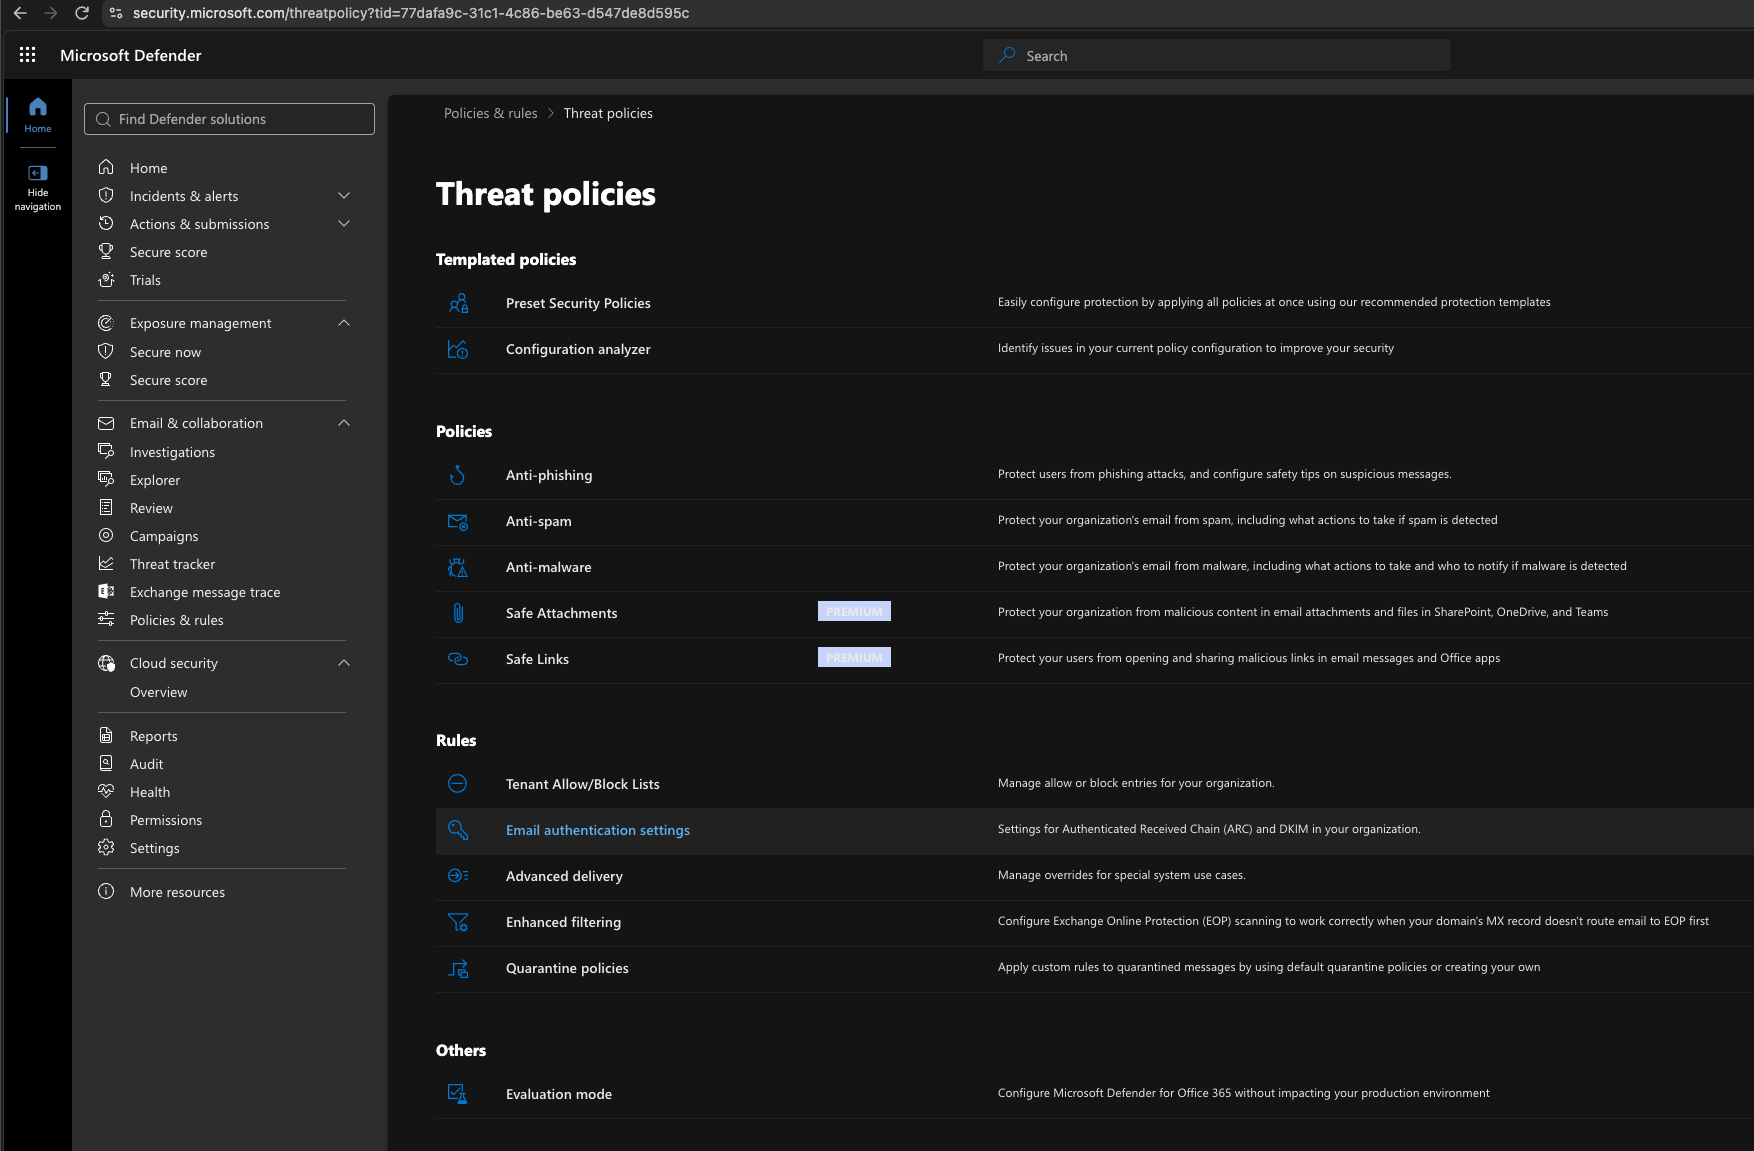
- Go into Threat policies and then under the Rules heading, click Email authentication settings.
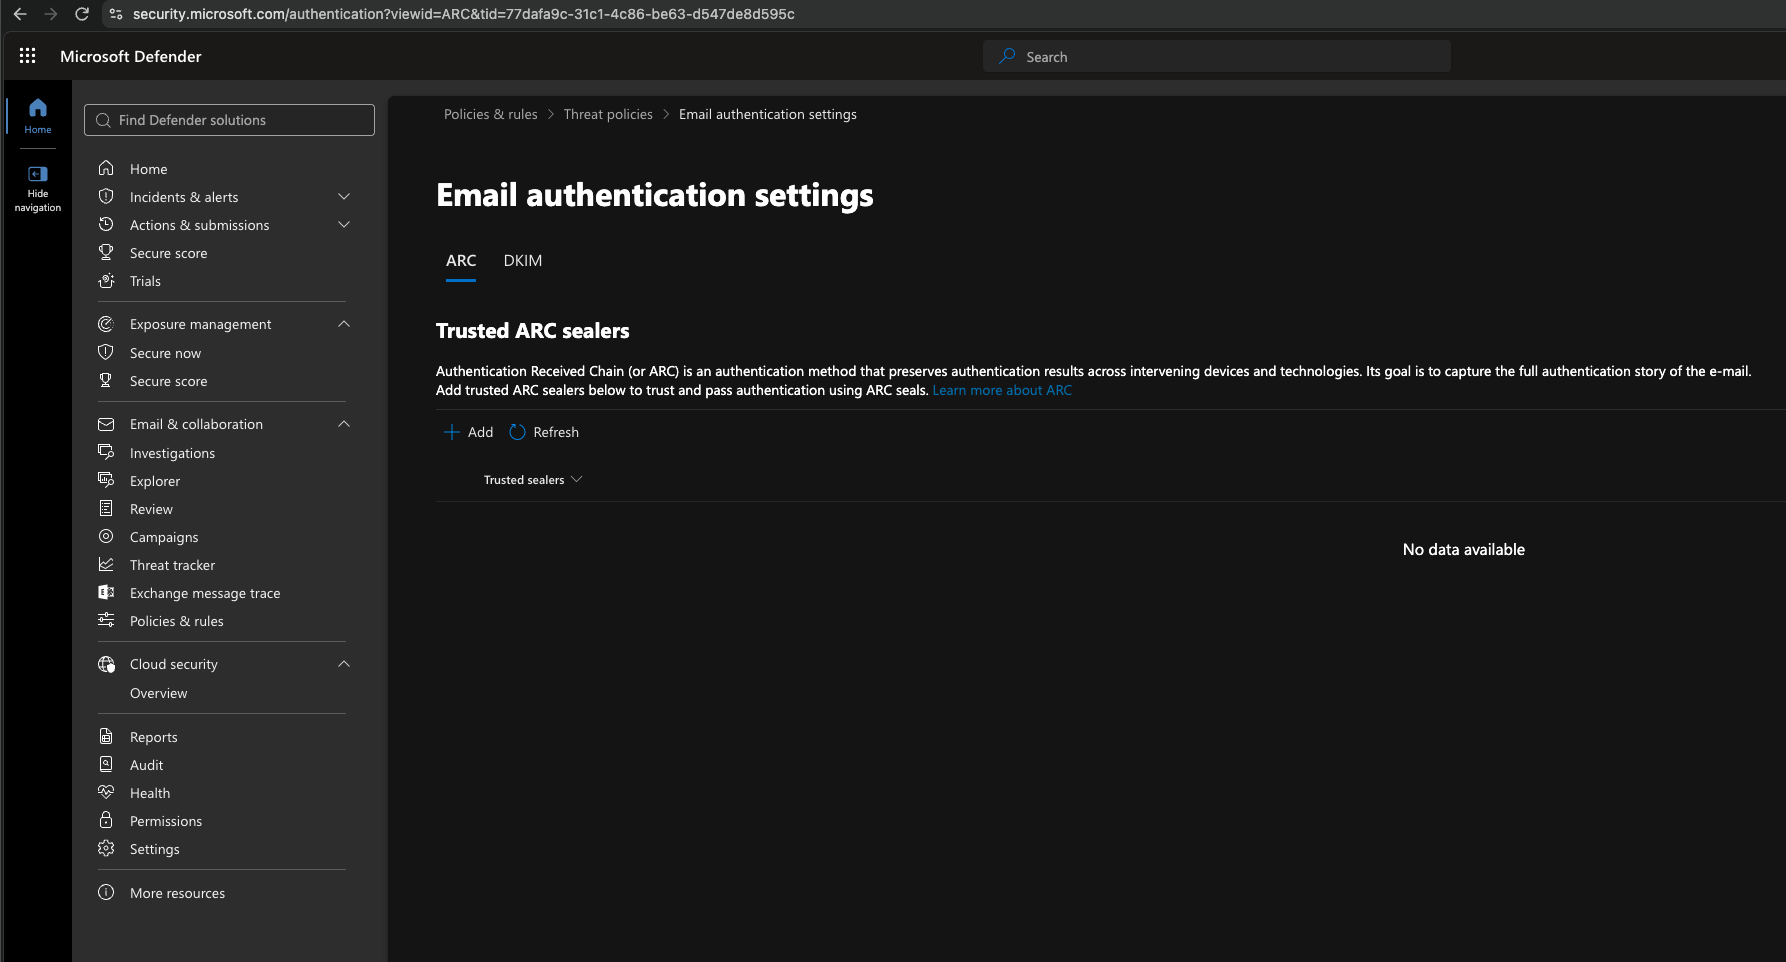
- Remaining on the ARC tab, click Add (or Edit if you already have existing Trusted Sealers).
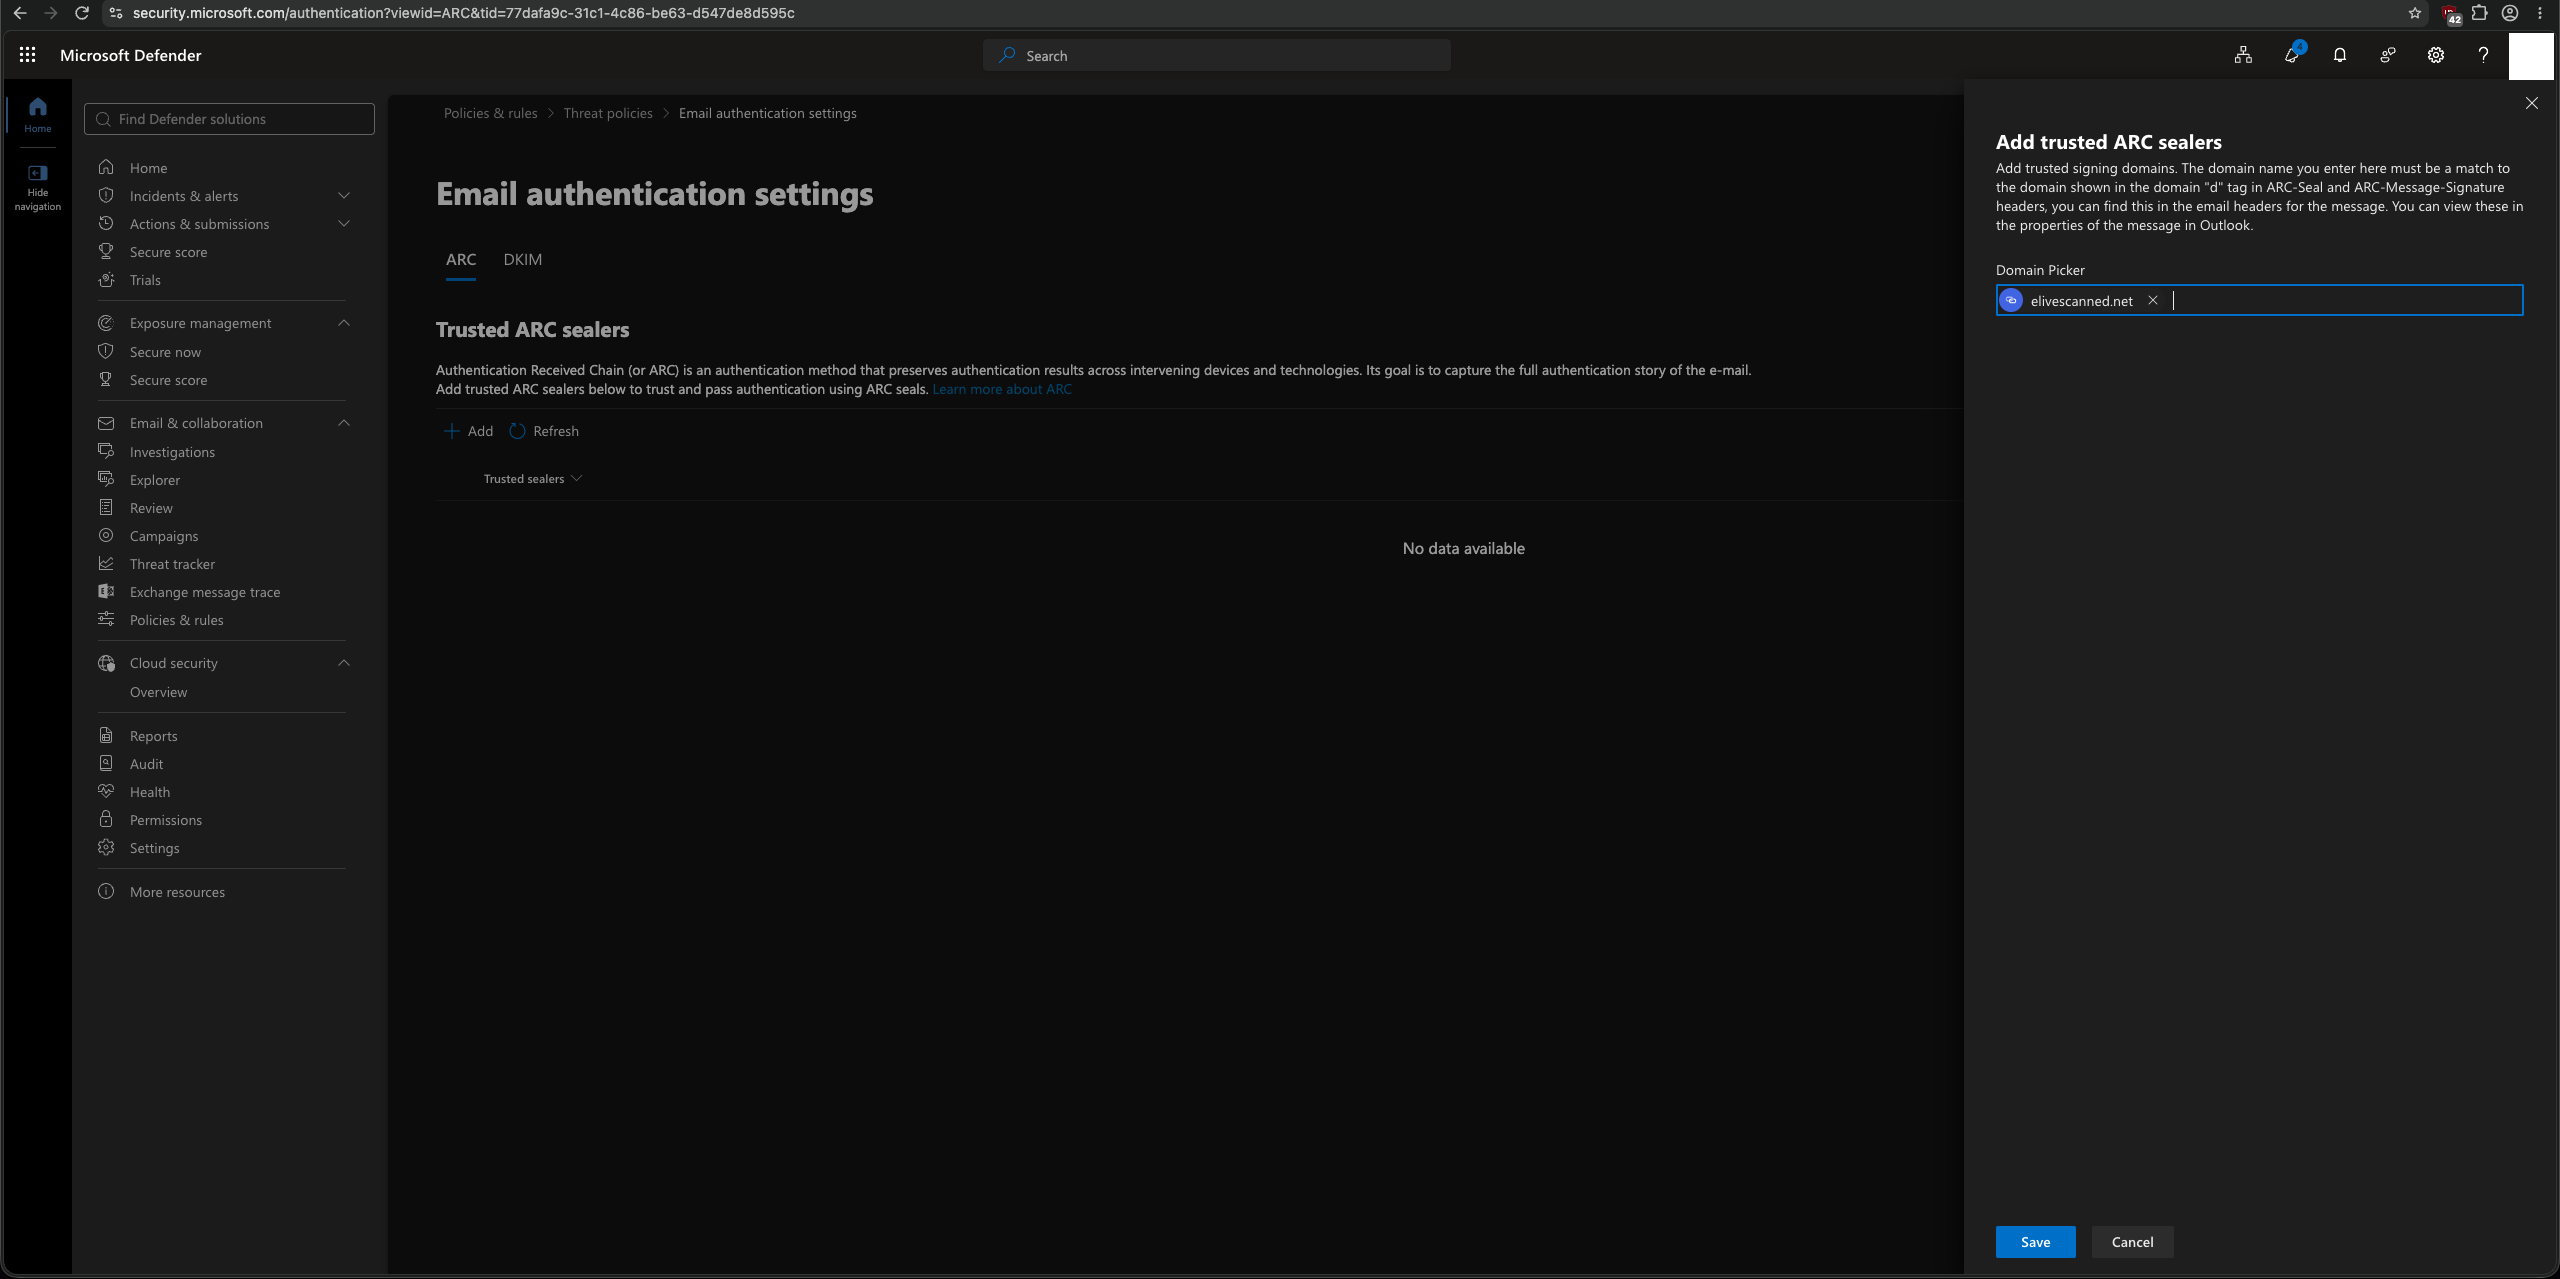
- Now enter in elivescanned.net into the box that appears on the right pane and hit enter to apply it, and then the Save button to save it.
- Finally, your screen should look like this, and if so, you're all set.
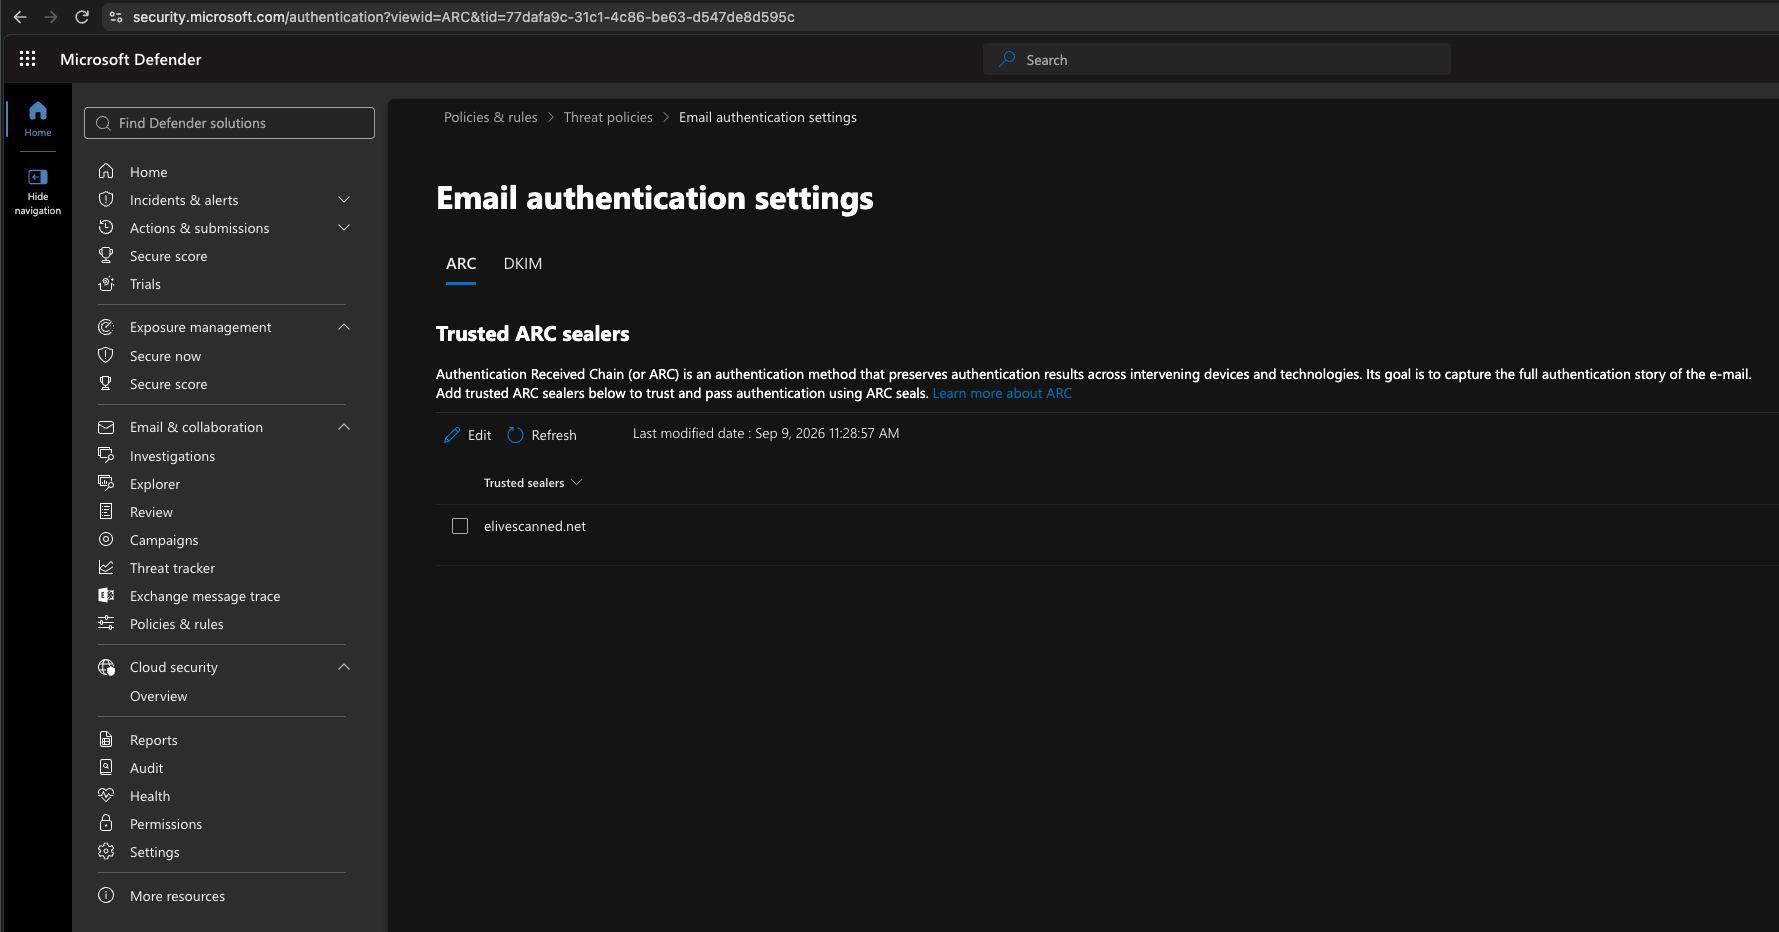
If you plan to complete the recommended configuration below, keep the Security Admin Center open, as you'll return to it in Part 2.
Recommended Additional Configuration
While adding Elive as a Trusted ARC Sealer will likely resolve forwarding-related DMARC issues, we also recommend completing the two parts below. These settings help Microsoft 365 identify the original senders of emails arriving through our scanners more accurately, reducing the chance of legitimate messages being mistaken for spam.
Part 1: Create an Inbound Connector for Our Scanners' IP Block
- Go to the Exchange Admin Center and log in with your 365 admin account (direct login via https://admin.microsoft.cloud/exchange).
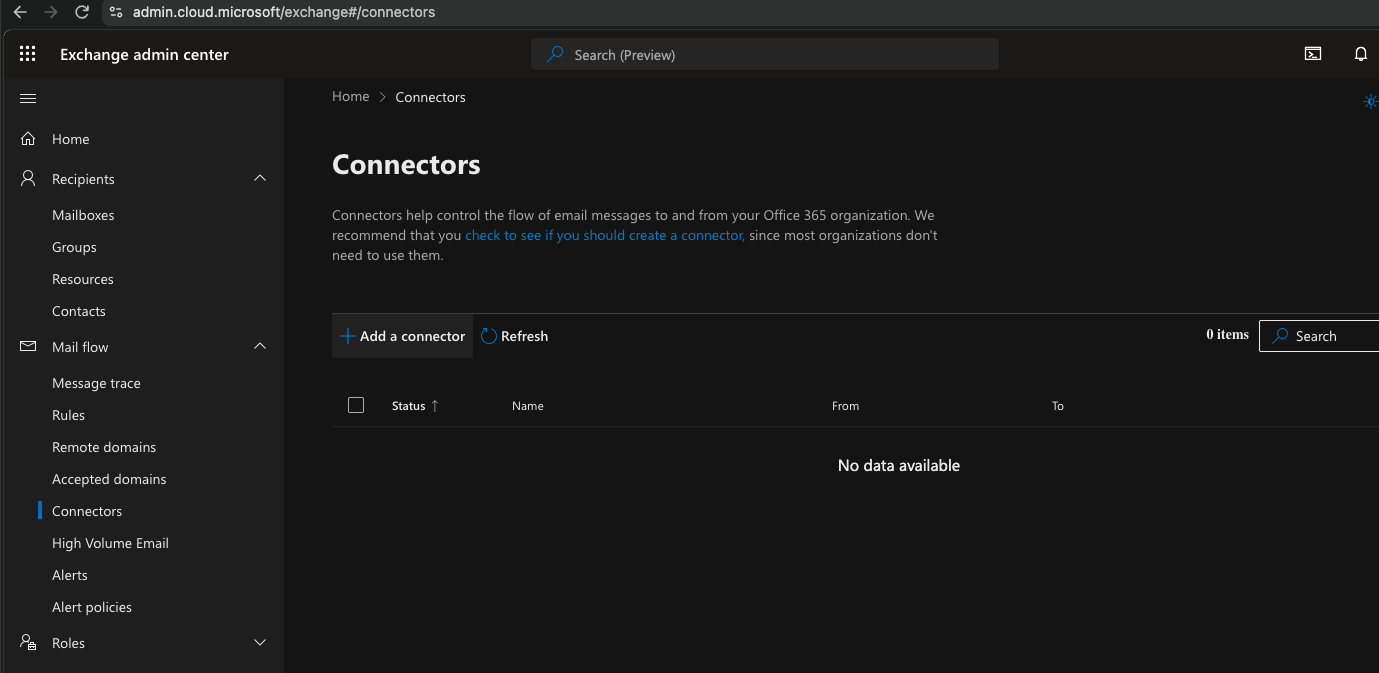
- Under Mail flow > Connectors on the left side menu, click Add a connector.
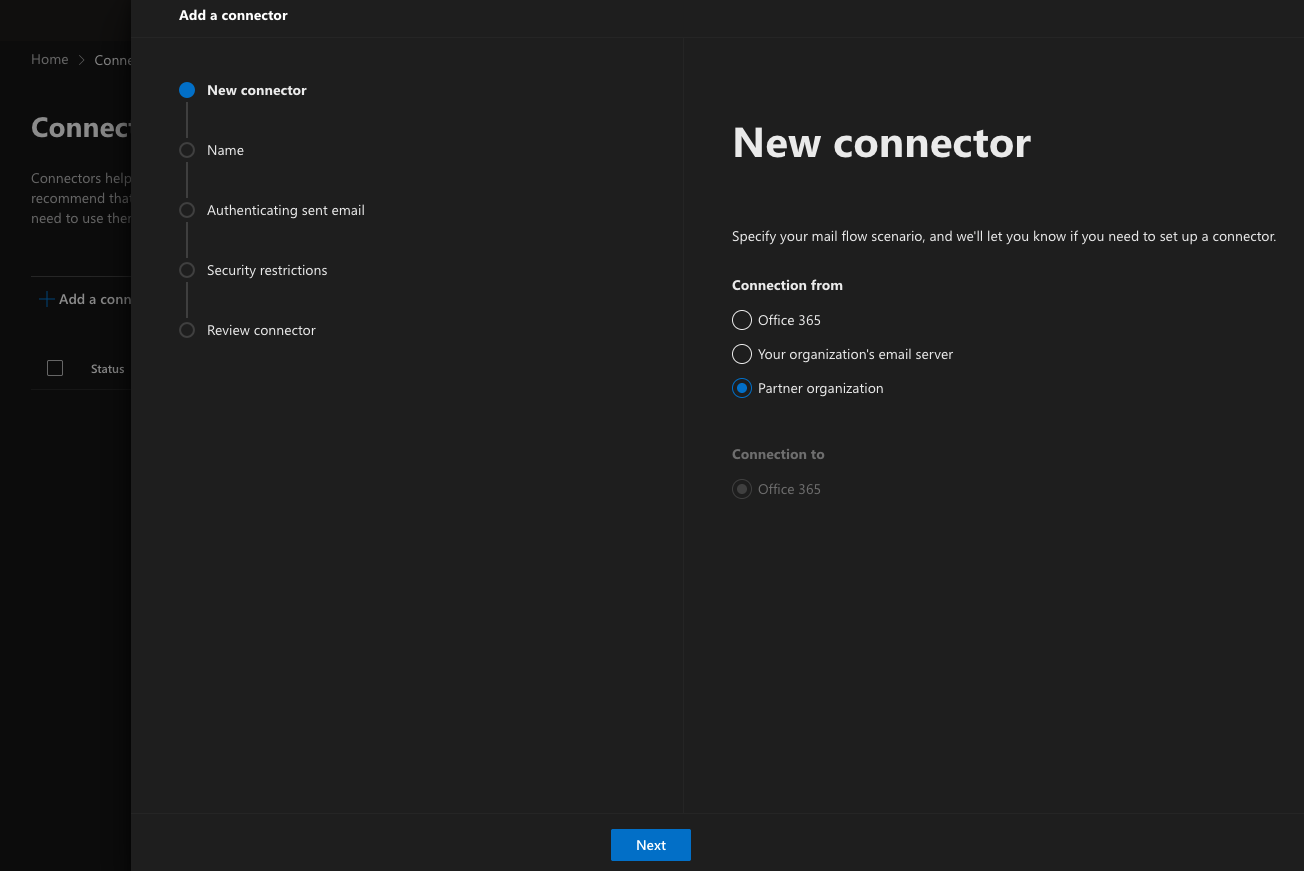
- Pick Partner organization under Connection from and click Next.
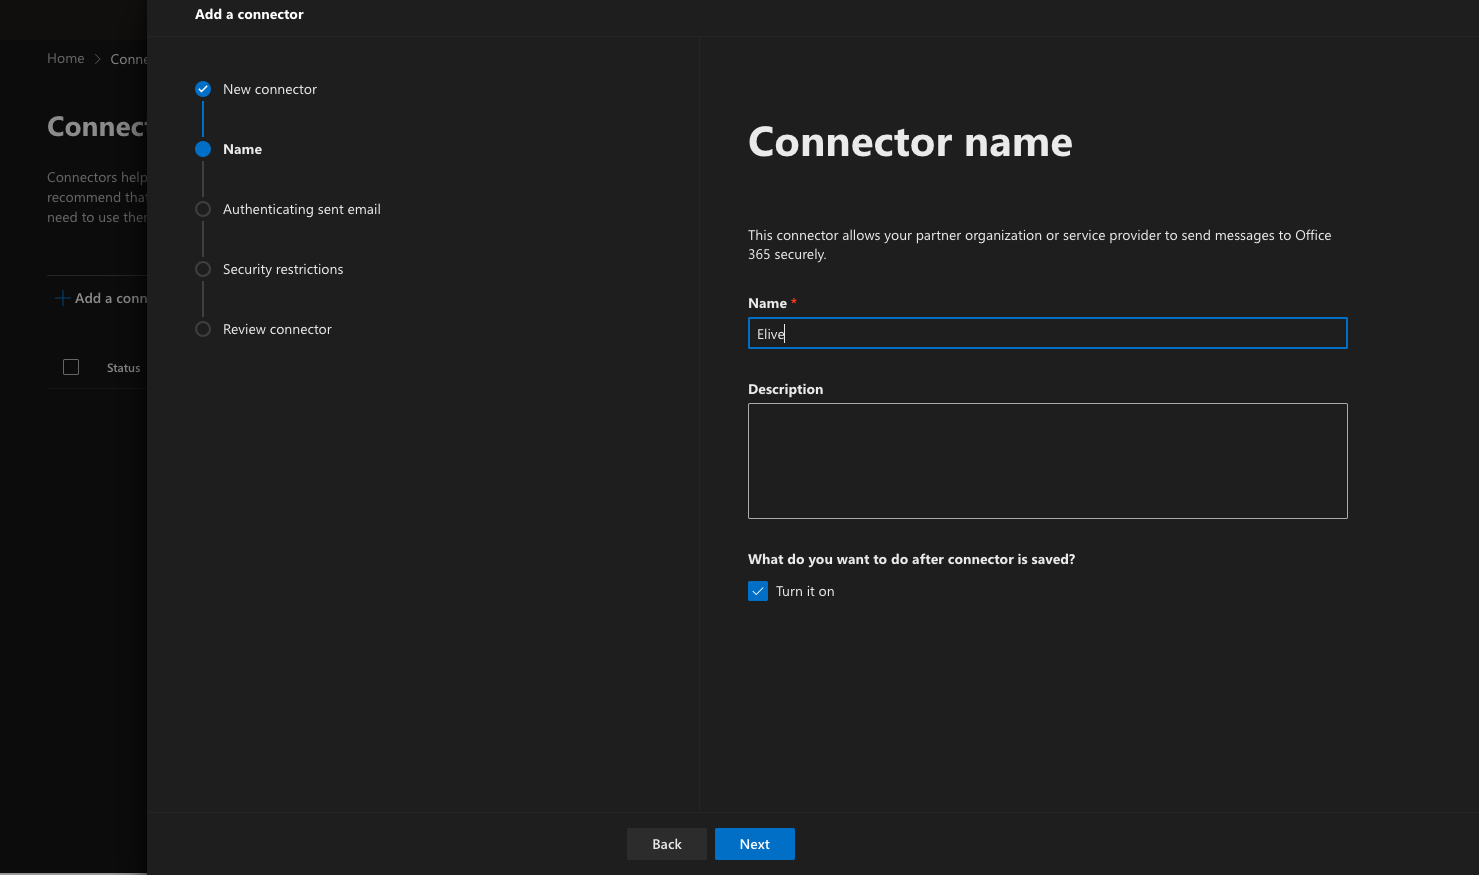
- Give it a name (ex. Elive), and ensure Turn it on is checked and click Next.
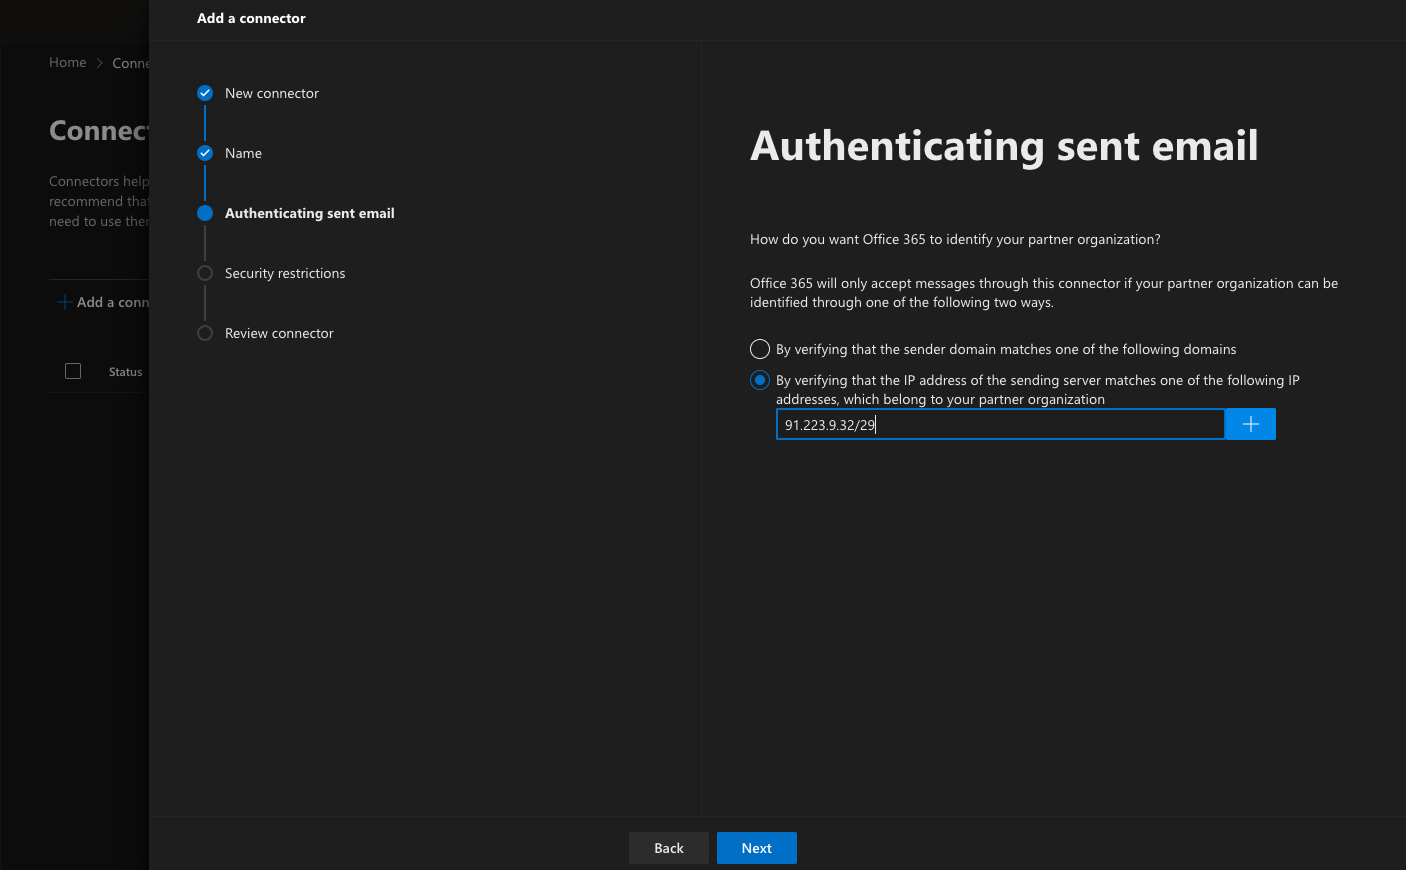
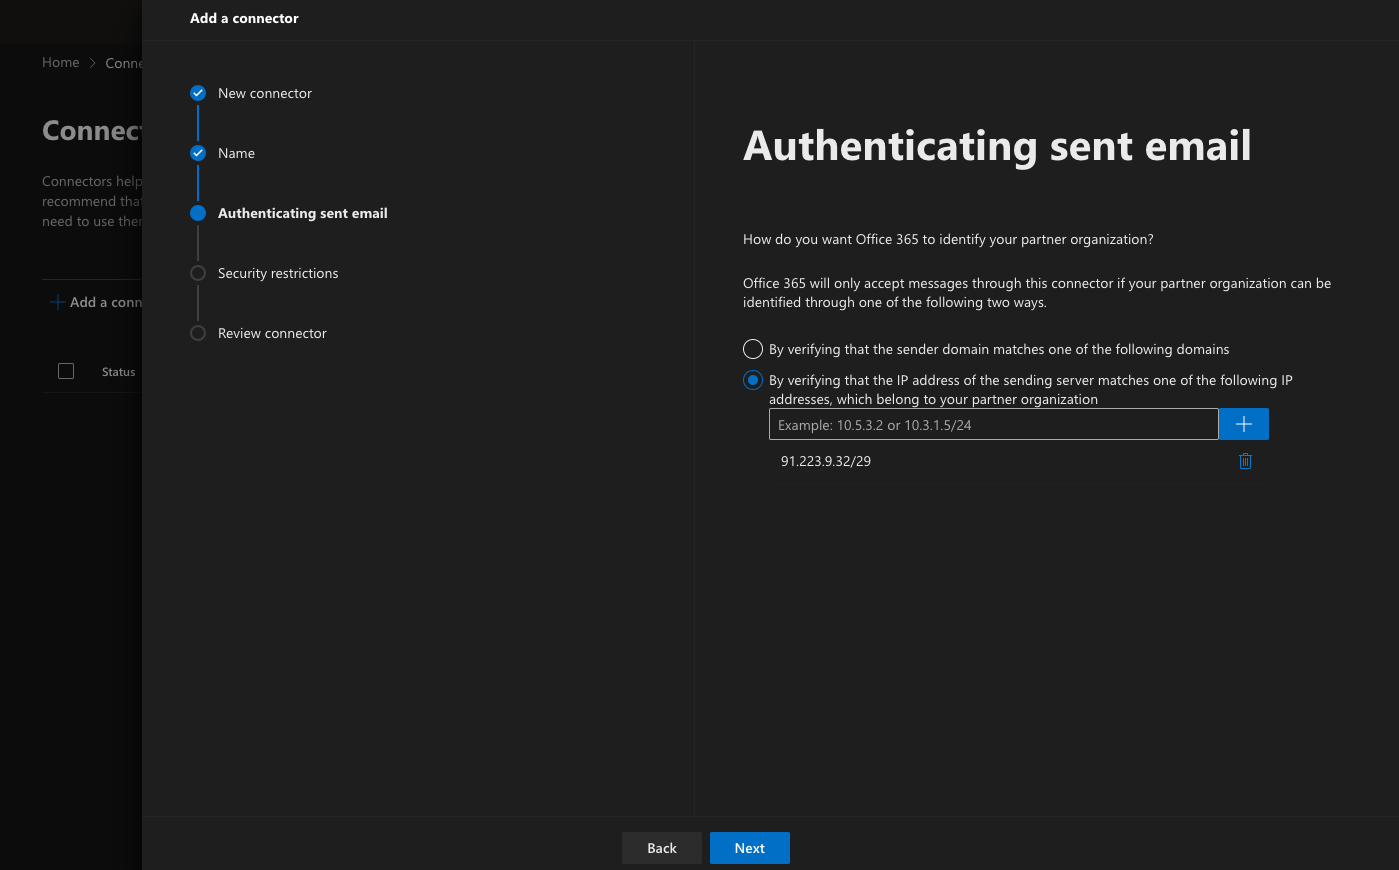
- Select By Verifying that the IP address…, and enter 91.223.9.32/29 in the box and click the blue + button. The IP block you just typed in should then appear below the text box. Then click Next.
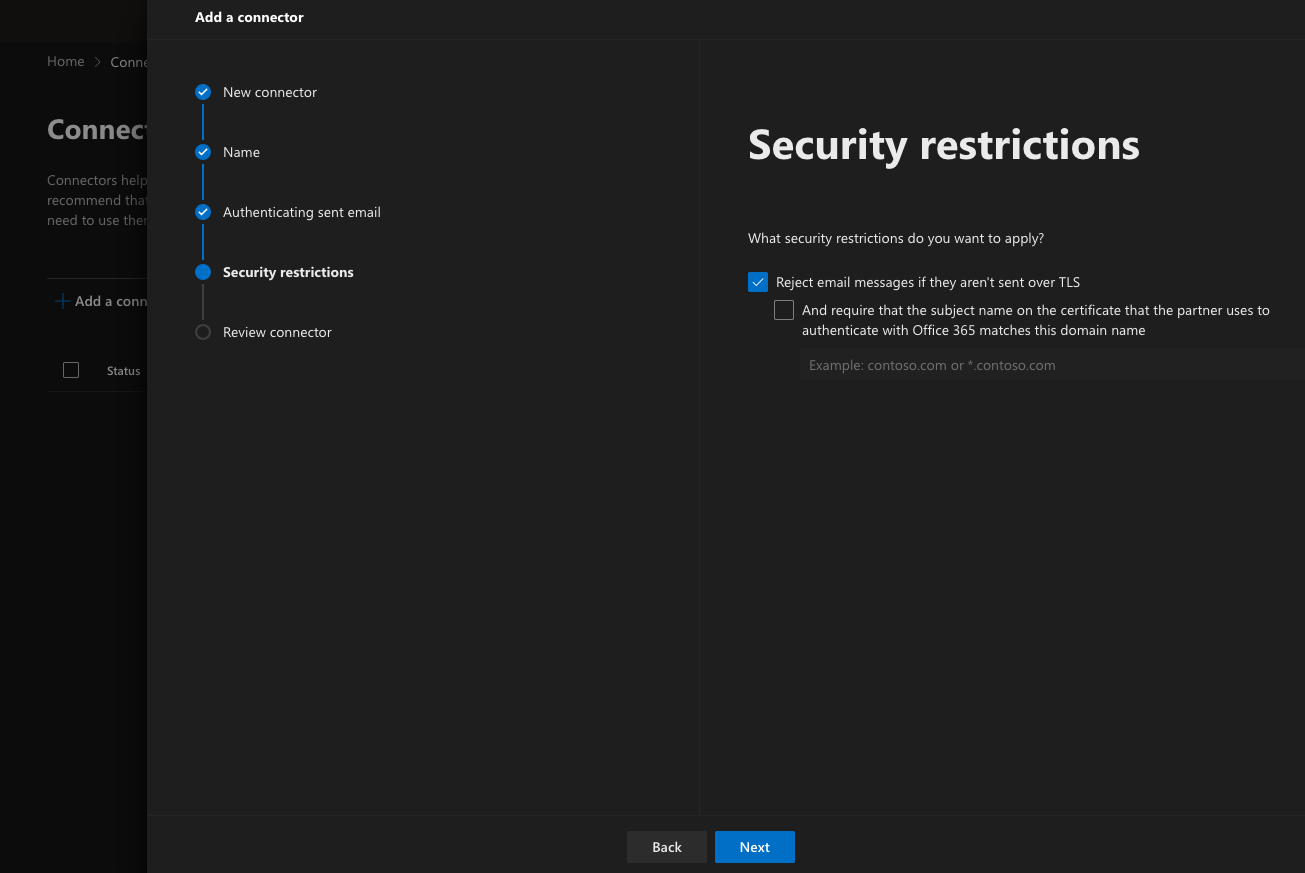
- Keep Reject email messages if they aren't sent over TLS checked and click Next.
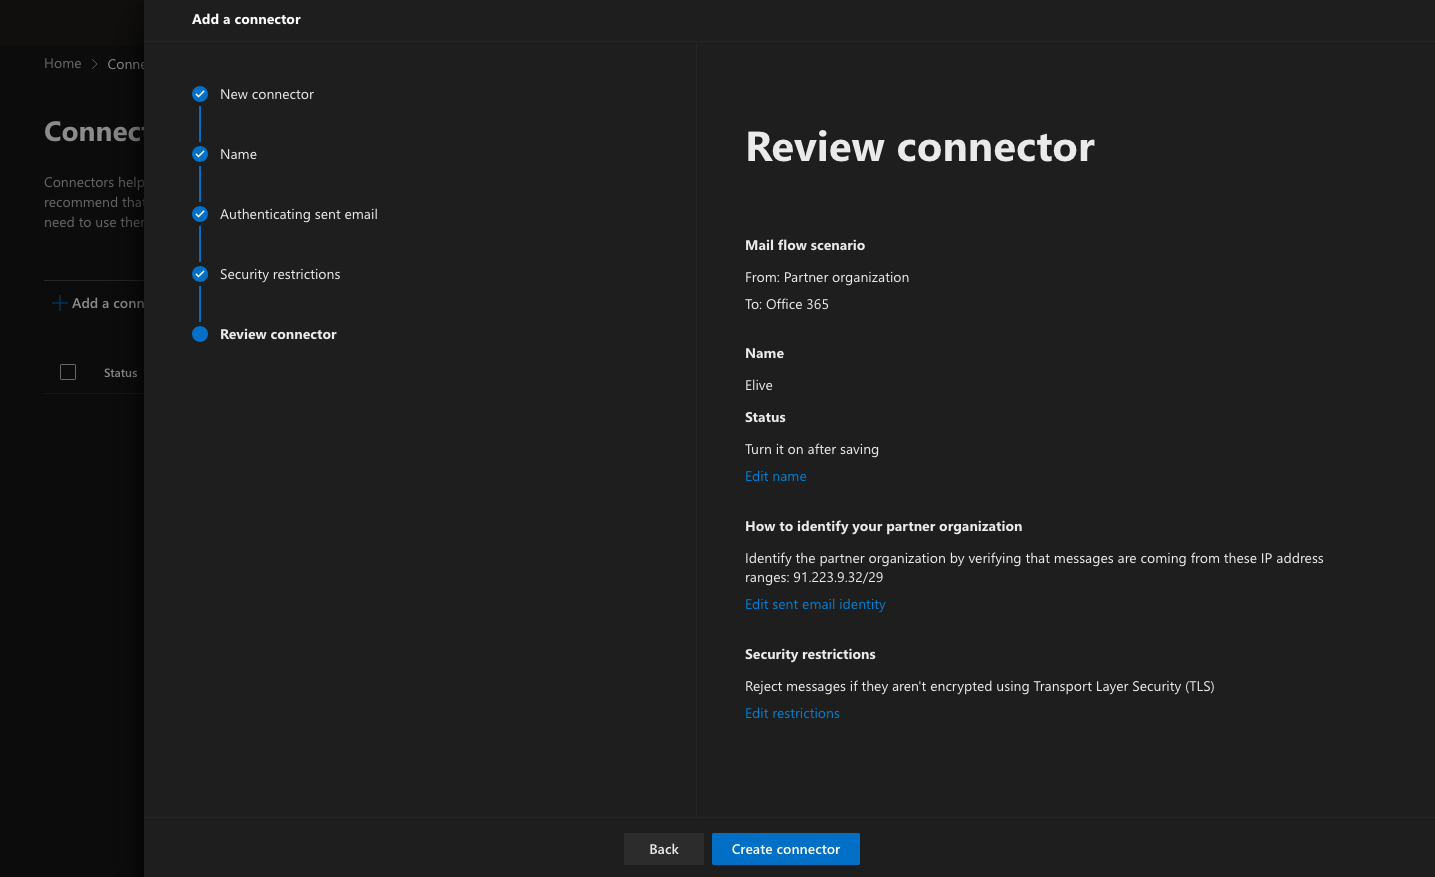
- Click Create Connector.
- This is what your screen should look like next.
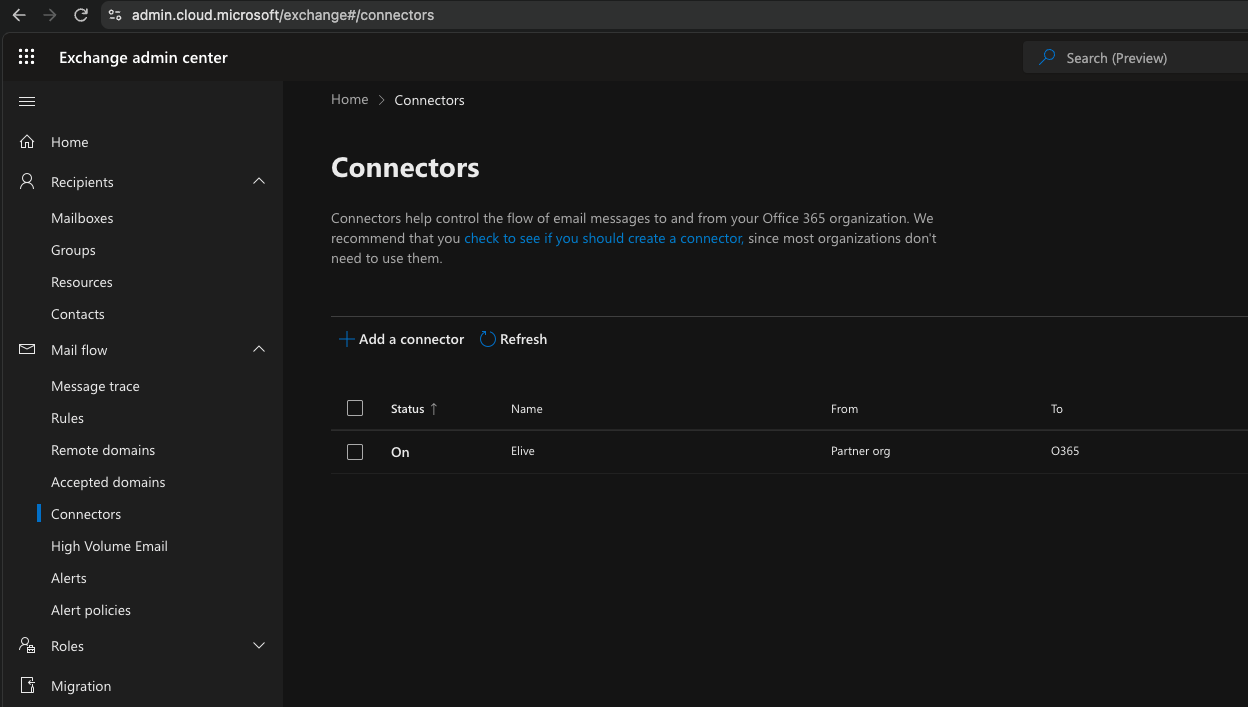
Part 2: Enable Enhanced Filtering for the Inbound Connector
- Go back to your Security Admin Center at https://security.microsoft.com/ and then back to Email & collaboration > Policy & rules > Threat policies, as in the Trusted ARC Sealer section.
- Go to Rules > Enhanced filtering.
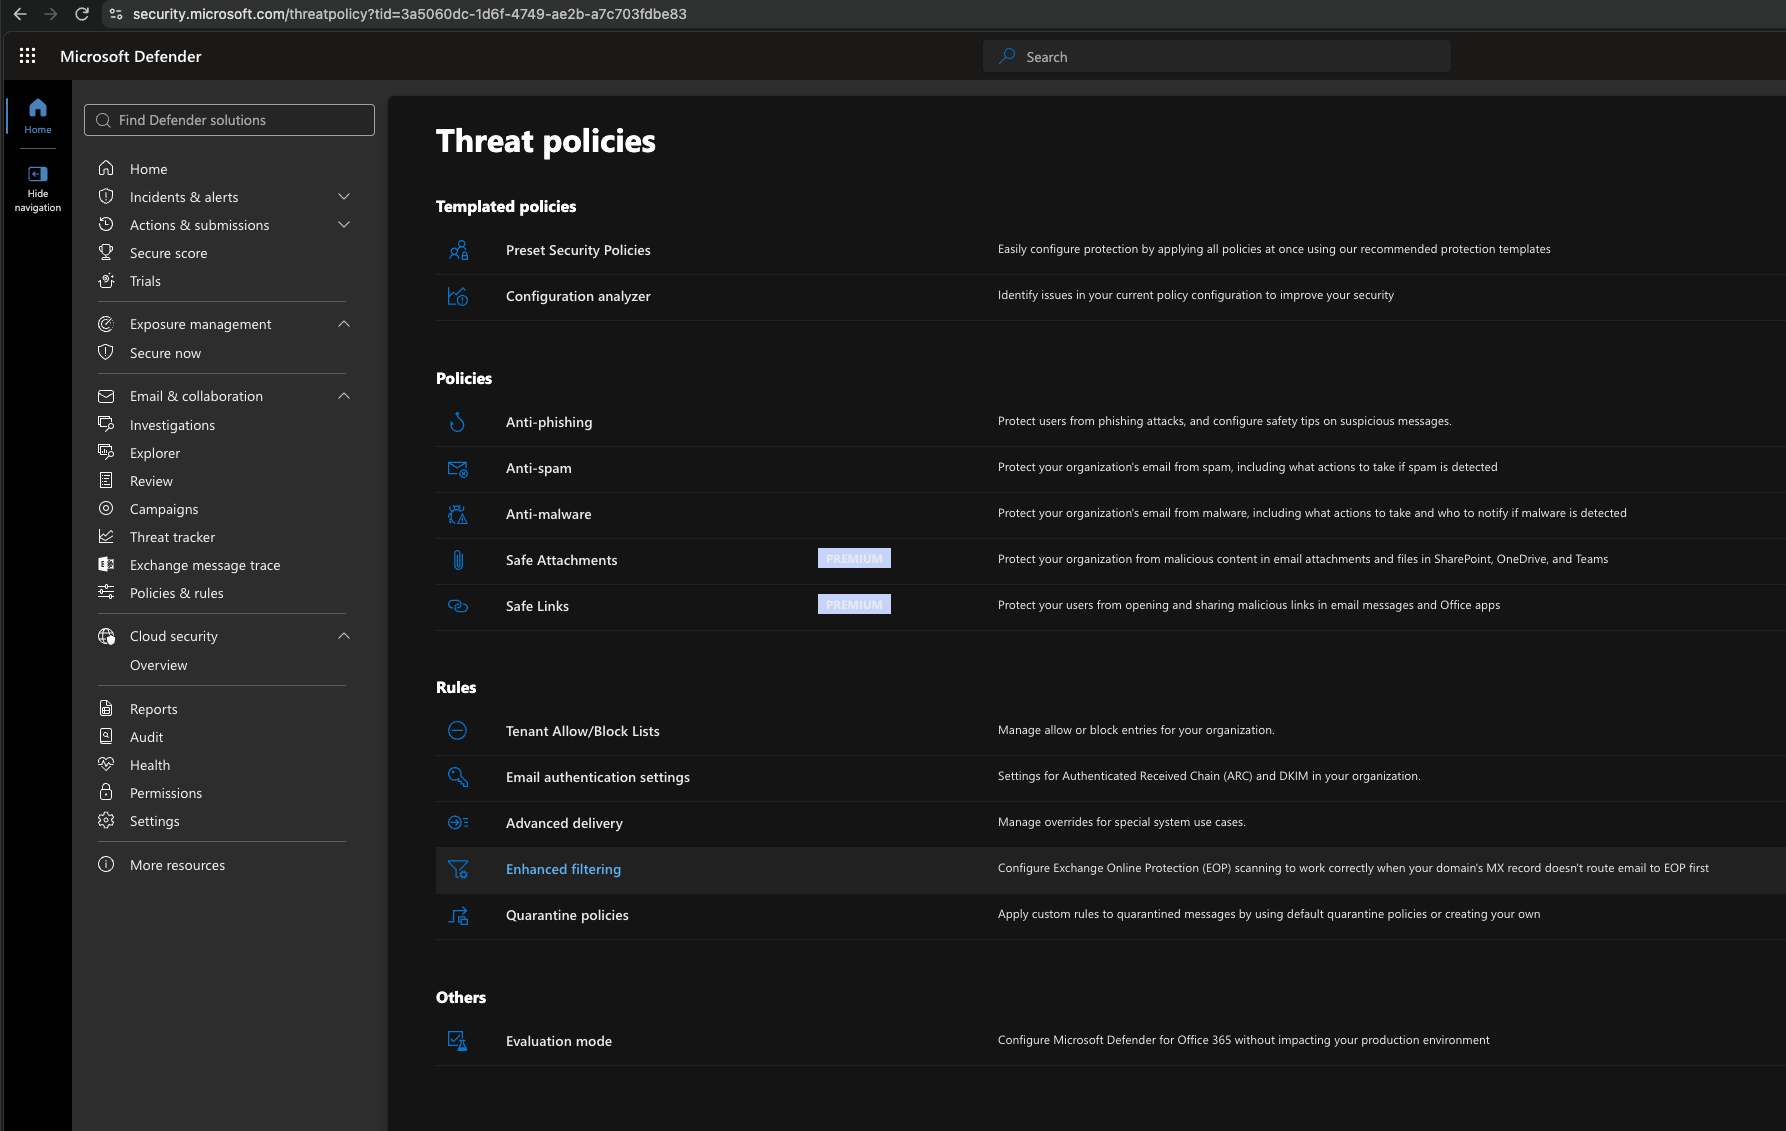
- On this screen you should see the Inbound Connector you created in Part 1 of this section on the list. Click on it to edit.
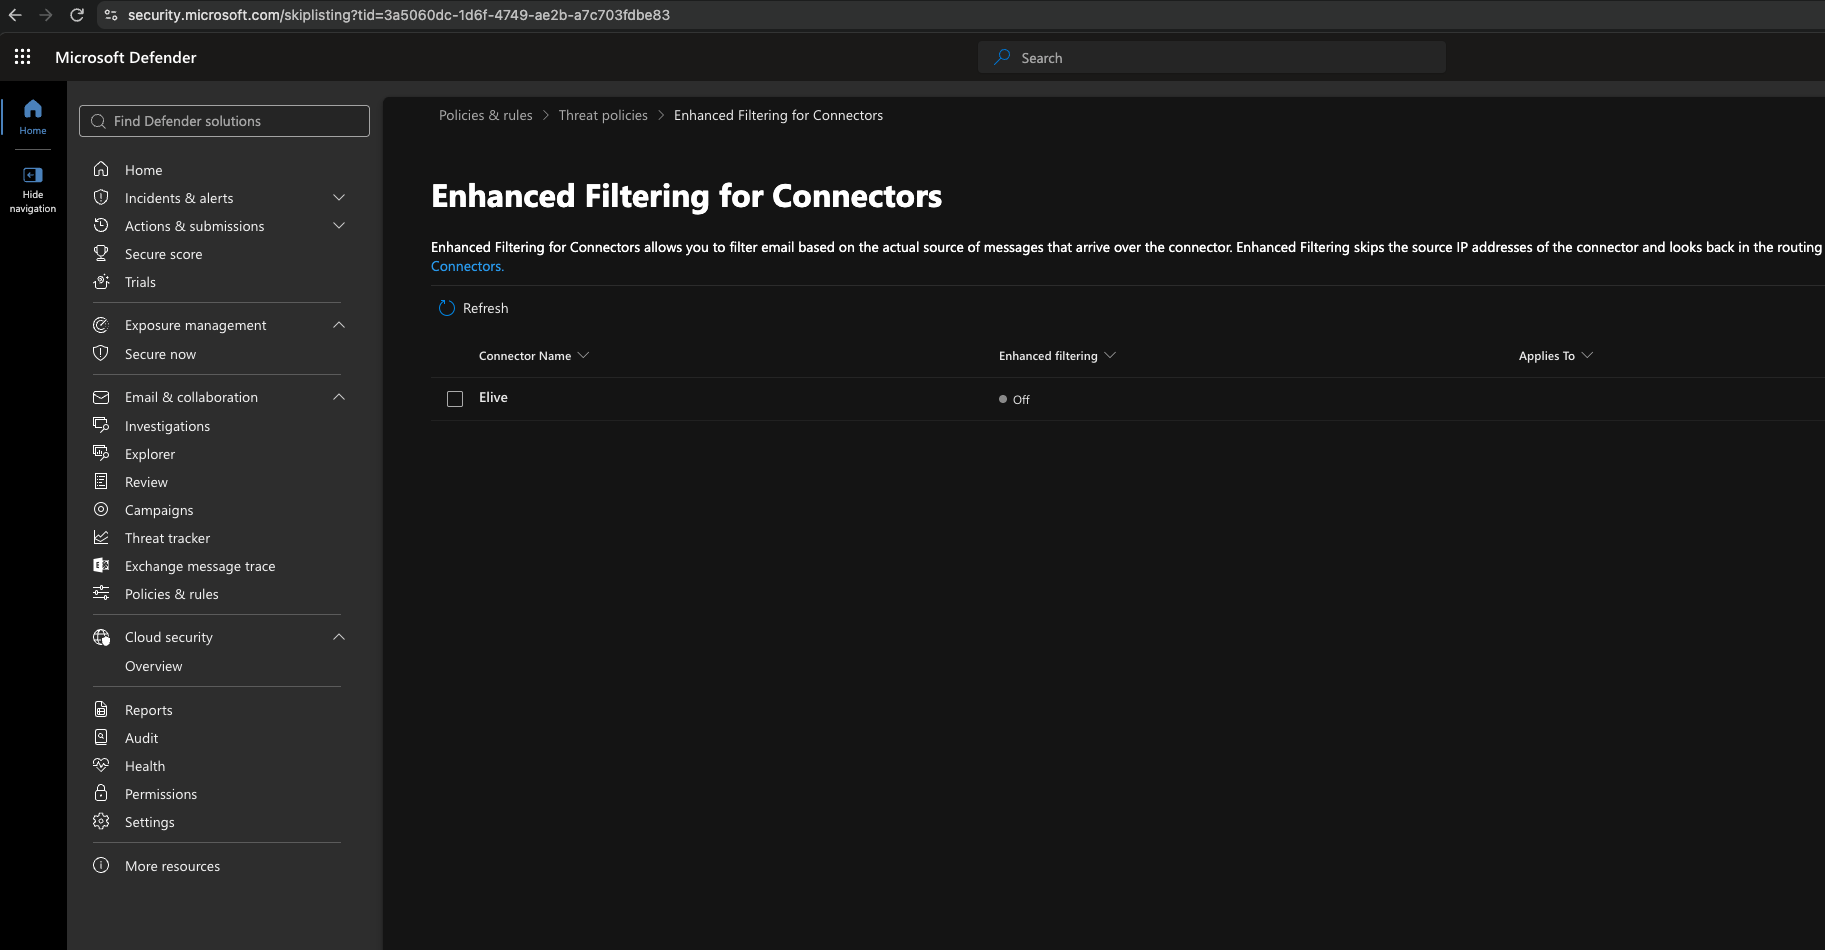
- Select the options Automatically detect and skip the last IP address, then Apply to entire organization, and then hit Save at the bottom.
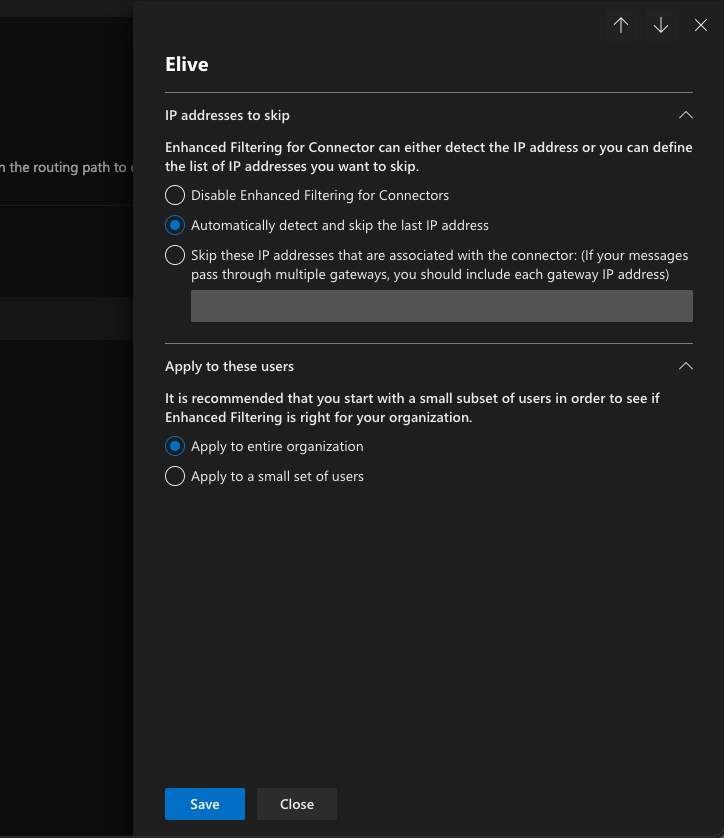
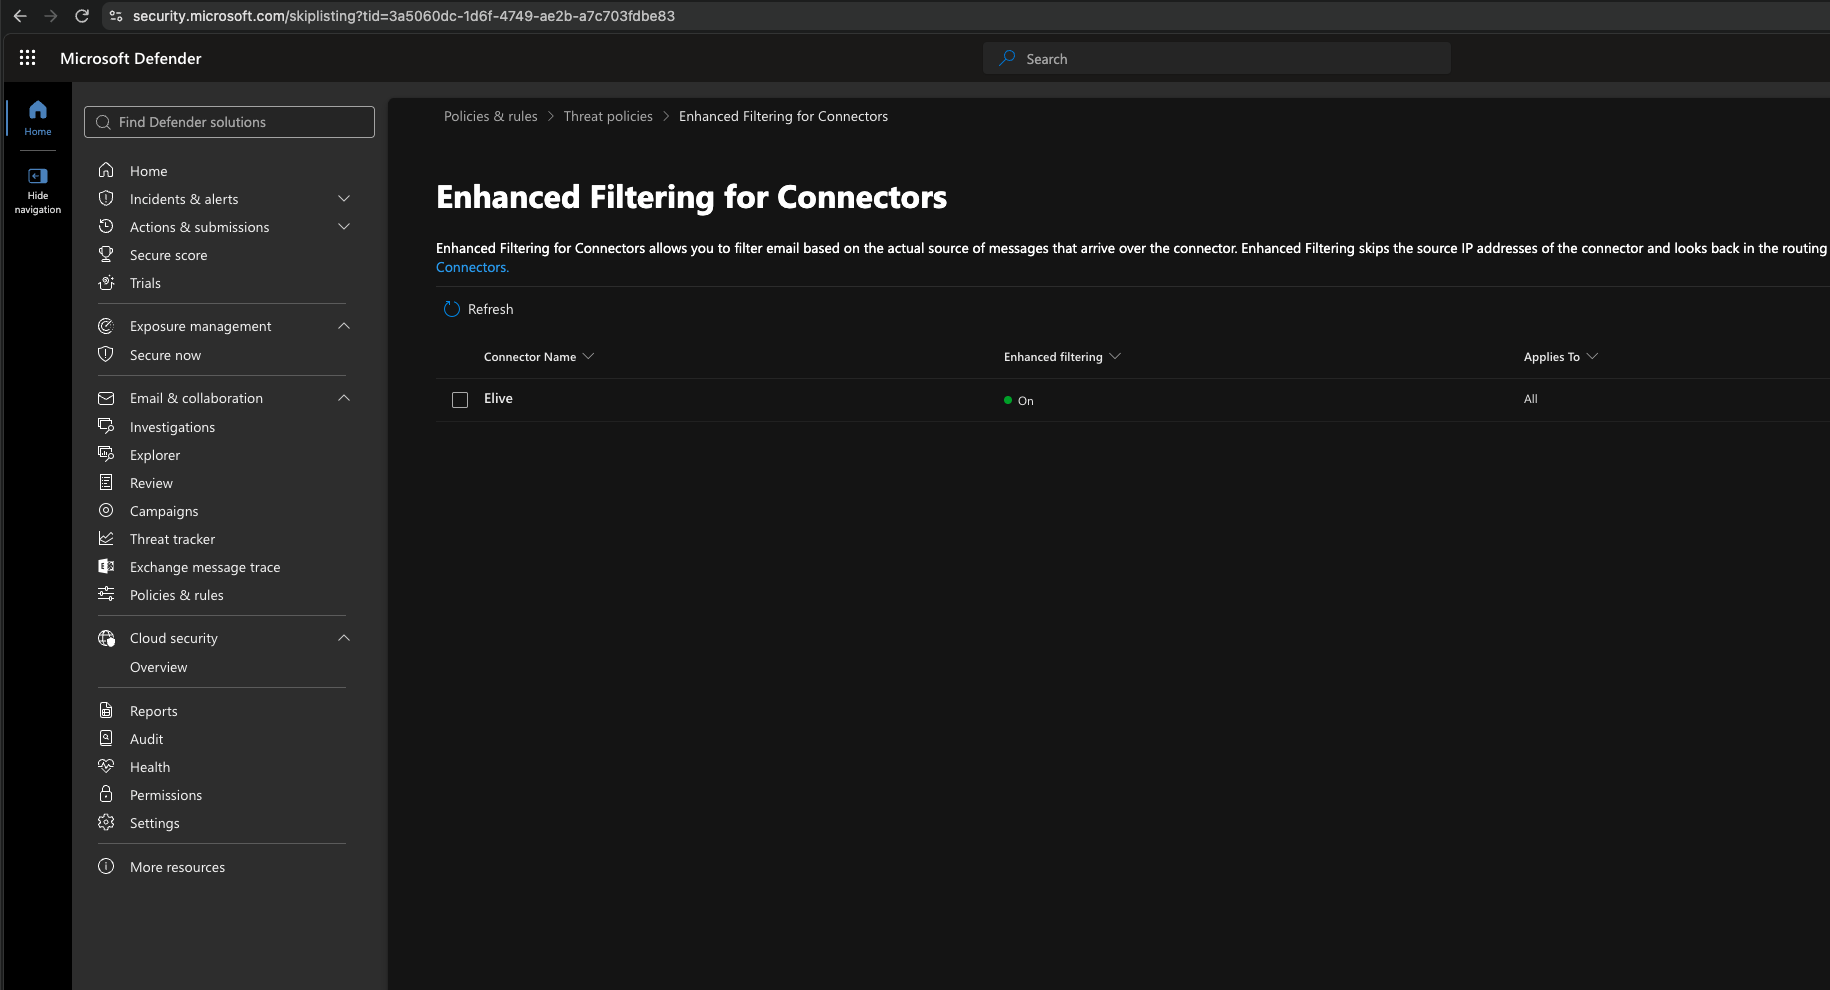
- After that your screen should show the Enhanced filtering as being on for the connector.
If you have any queries about this, you can contact us by email or open a support ticket to ask any of our staff.
Last updated: November 6, 2026
